Locations
Add a location, rename it or change its code, archive it when it is empty, switch between locations, and choose which ones each tech can reach.
A location is a separate stockroom: a building, a yard, a store. Each location has its own folders, its own counts and its own minimums. Stock in one location is never counted as stock in another. A transfer moves it between them. For how locations, folders and items fit together, see Welcome.
Your company may call its locations something else: property, site, facility, store or branch. The screens use your word. This manual says "location". See Company settings.
What you'll need#
- The Owner or Manager role. Techs and viewers do not see Locations in Settings.
- For a new location, room in your plan. Your plan says how many locations you can have. See What happens at your plan's limit.
- A signal. These screens need a connection.
Steps#
Add a location#
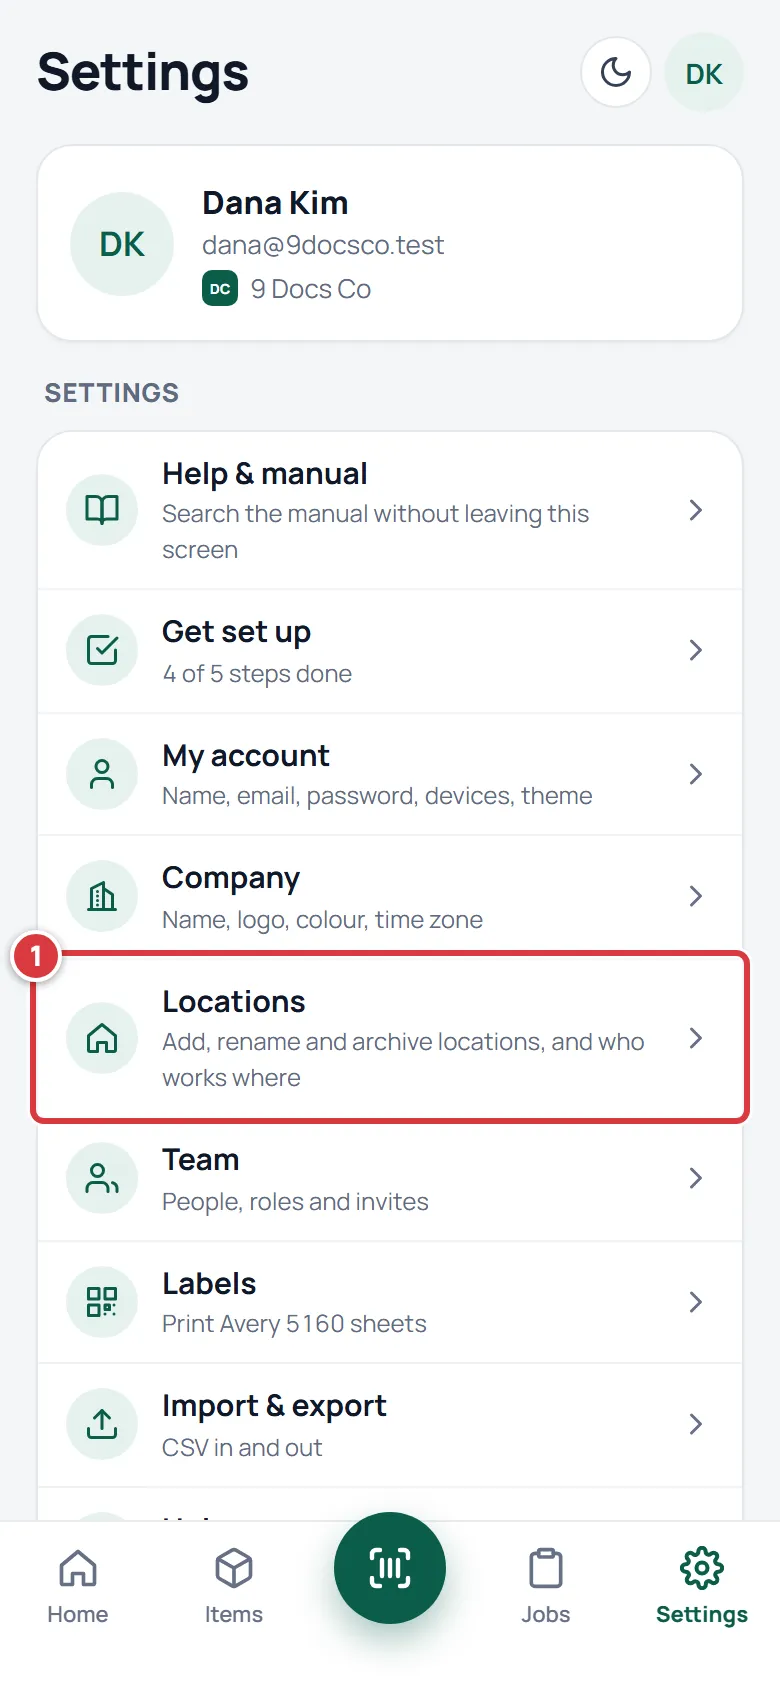
- Tap Settings at the bottom of the screen, then Locations. On a computer, click Settings in the left menu, then Locations.
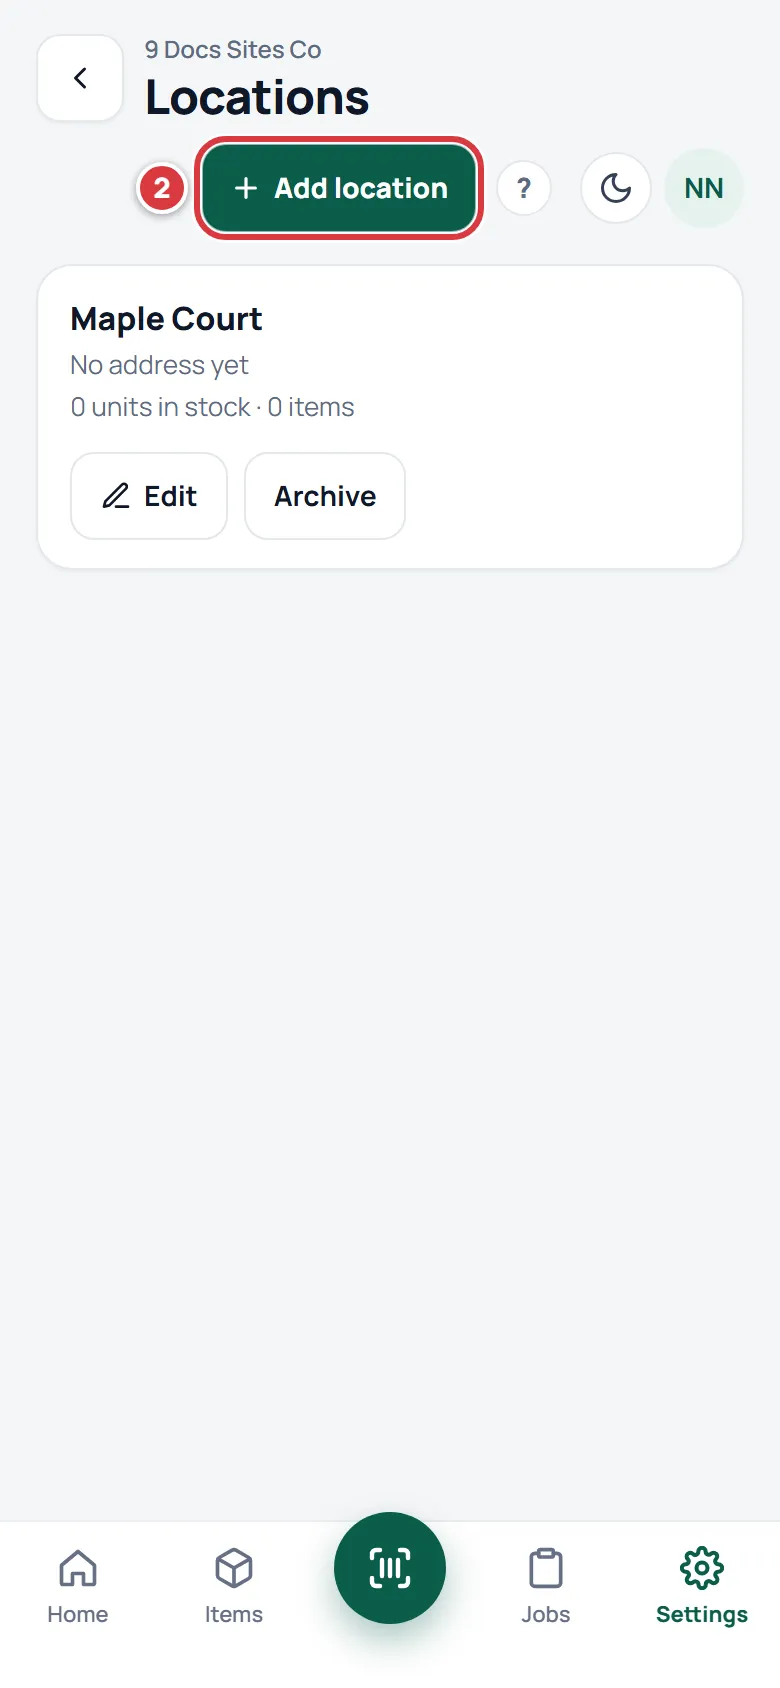
- Tap Add location, at the top right.
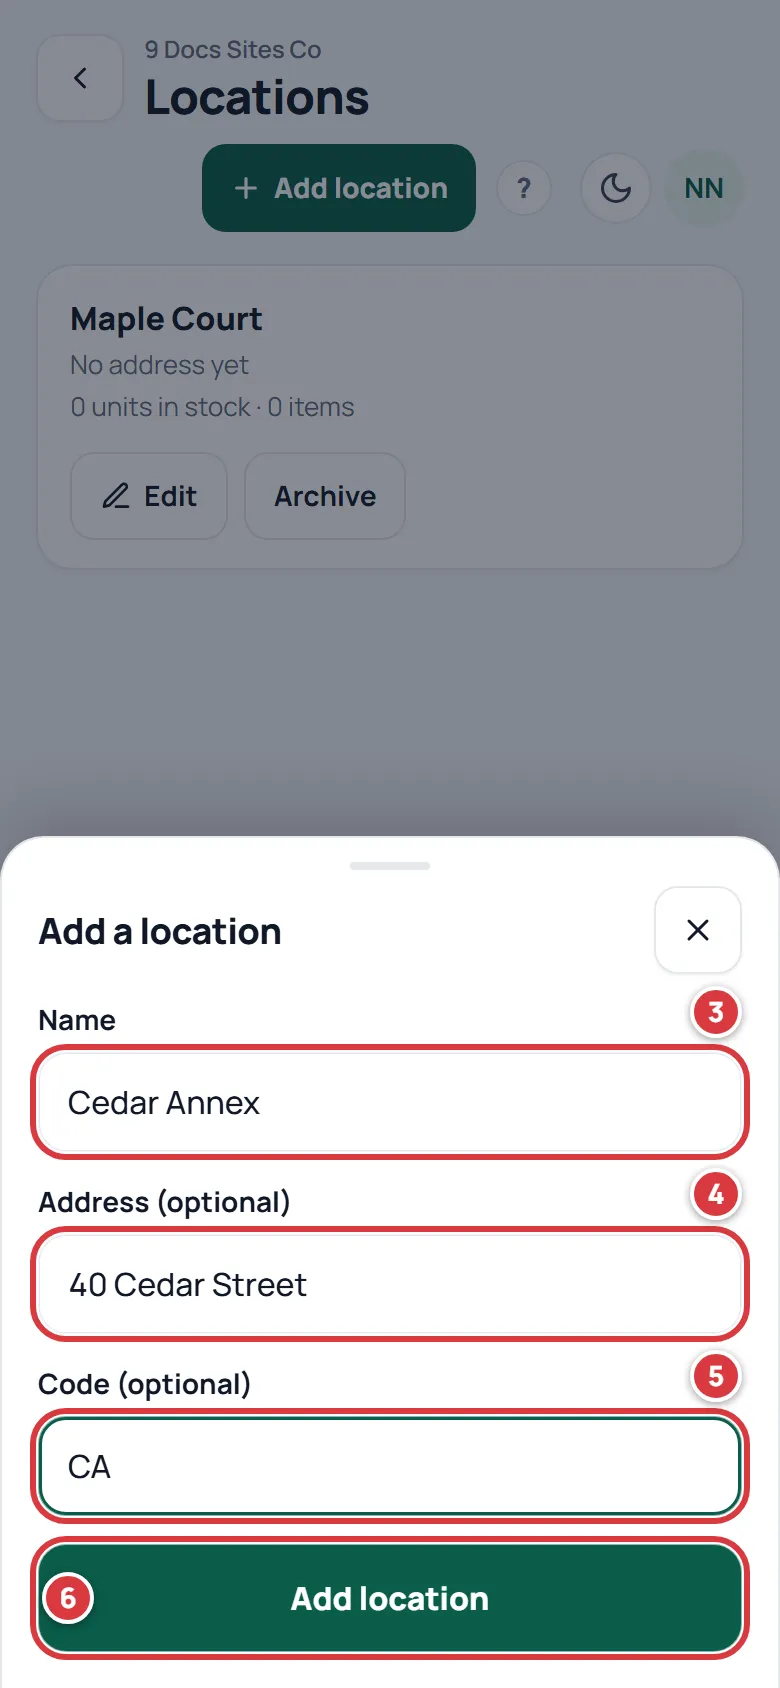
- Type the Name, for example "Cedar Annex".
- Type an Address (optional). You can leave it empty.
- Type a Code (optional): a few letters that name the location in a small space, like CA.
- Tap Add location.
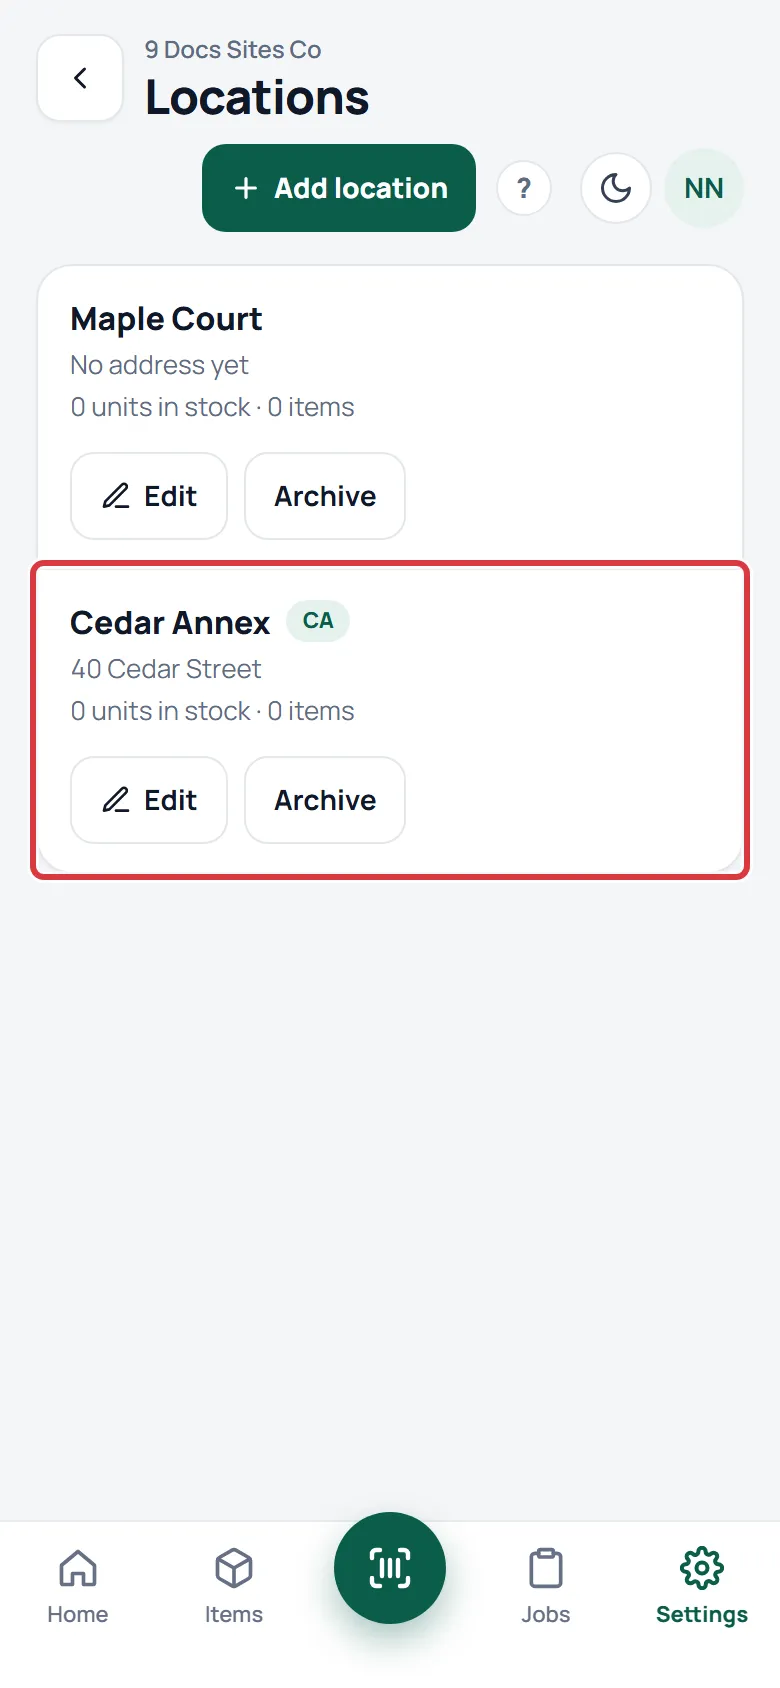
The sheet closes and the new location is in the list, with "0 units in stock · 0 items".
A new location has no folders. Add some before you put stock there. See Folders. Techs only see it once you tick it for them: see Choose which locations a tech can reach.
Rename a location or change its code#
Tap Settings, then Locations, then Edit on the location. Then:
- Change the Name.
- Change the Code (optional). You can change the Address (optional) here too.
- Tap Save changes.
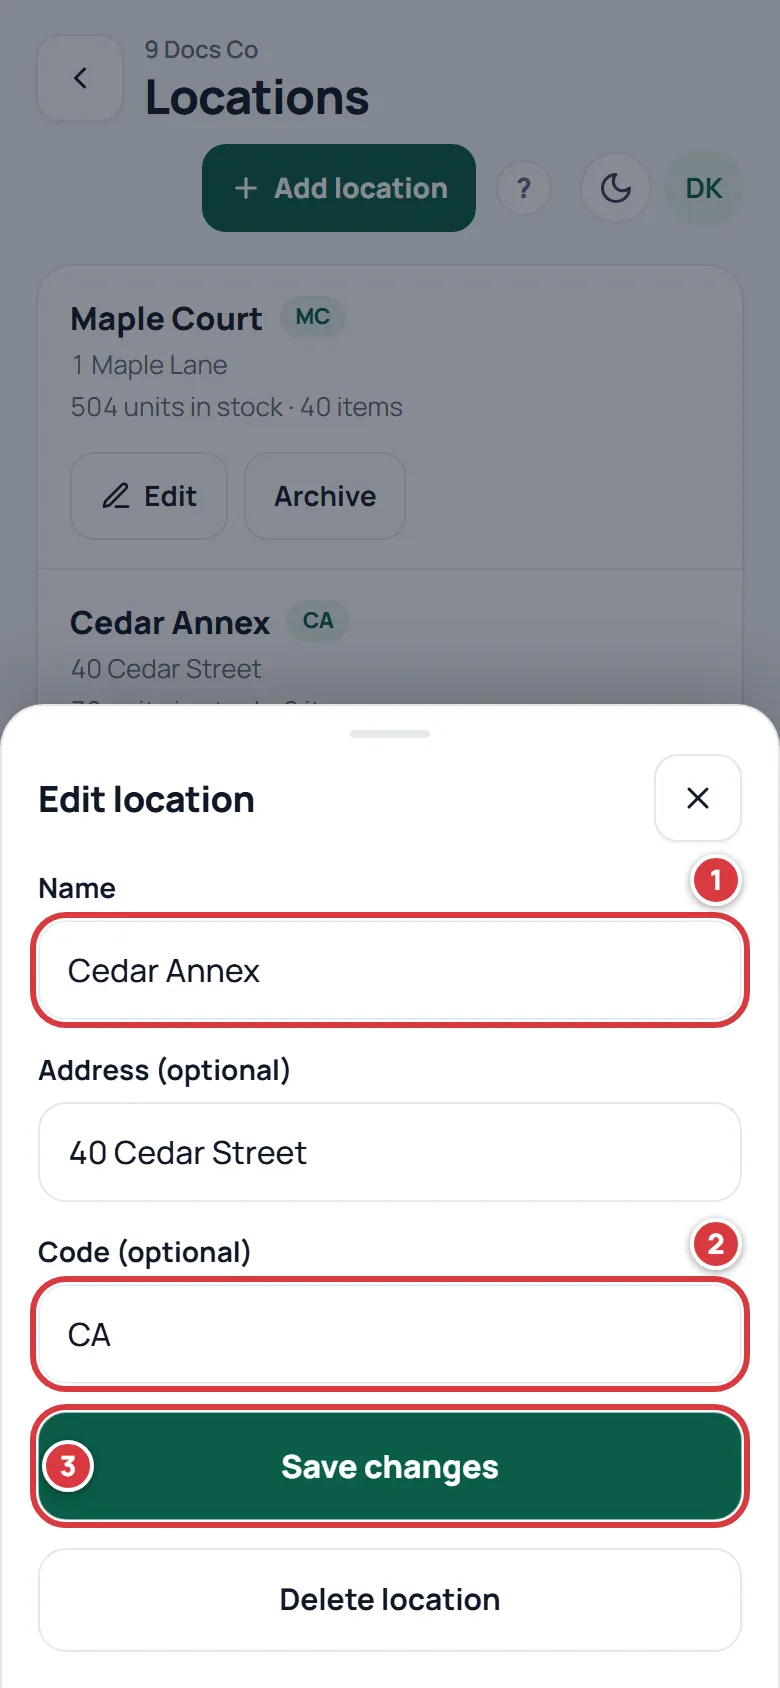
The code shows next to the name in the location switcher and in lists. Two locations cannot share a code. The stock and history stay where they are.
If you added a location by mistake and nothing is in it, Delete location in this sheet removes it. The app asks you to confirm with Delete. It only works for a location with no folders, jobs, orders or tools. Otherwise use Archive.
Archive a location#
Archive a location you no longer use. It stays in your history, but it leaves the switcher, every list, Home, reports and the daily email, and stops counting toward your plan. You can bring it back.
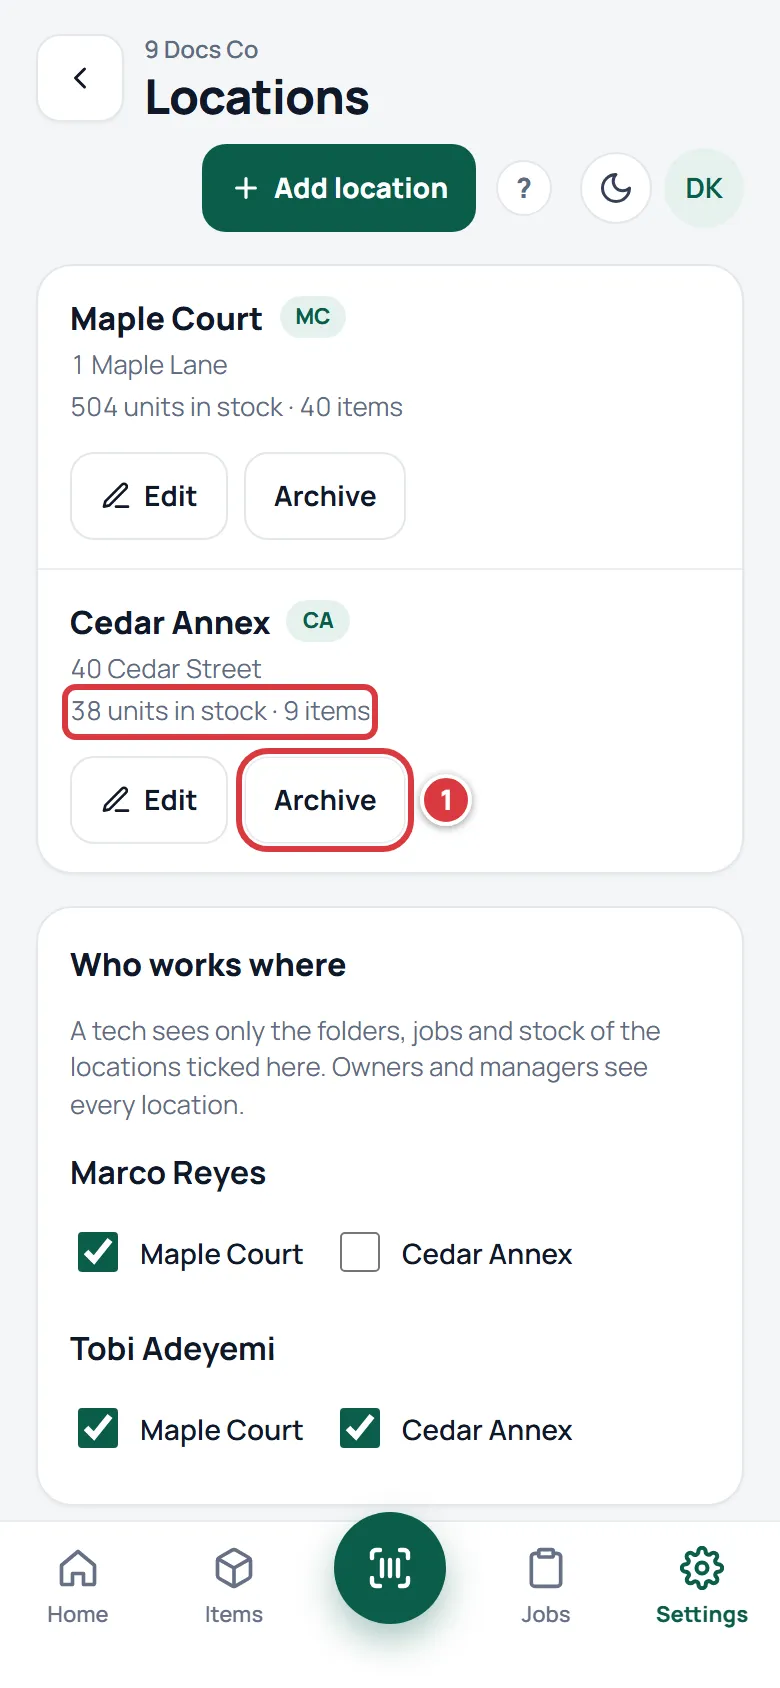
A location can only be archived when it holds no stock. Each row on the Locations screen says how many units and items it holds, so you can check first. Move the stock to another location with a transfer, then archive. See Moving stock.
Tap Settings, then Locations. Look at the stock line under the location's name: it must say "0 units in stock". Then:
- Tap Archive on the location. A sheet titled with the location's name opens.
- Read what it says.
- Tap Archive location.
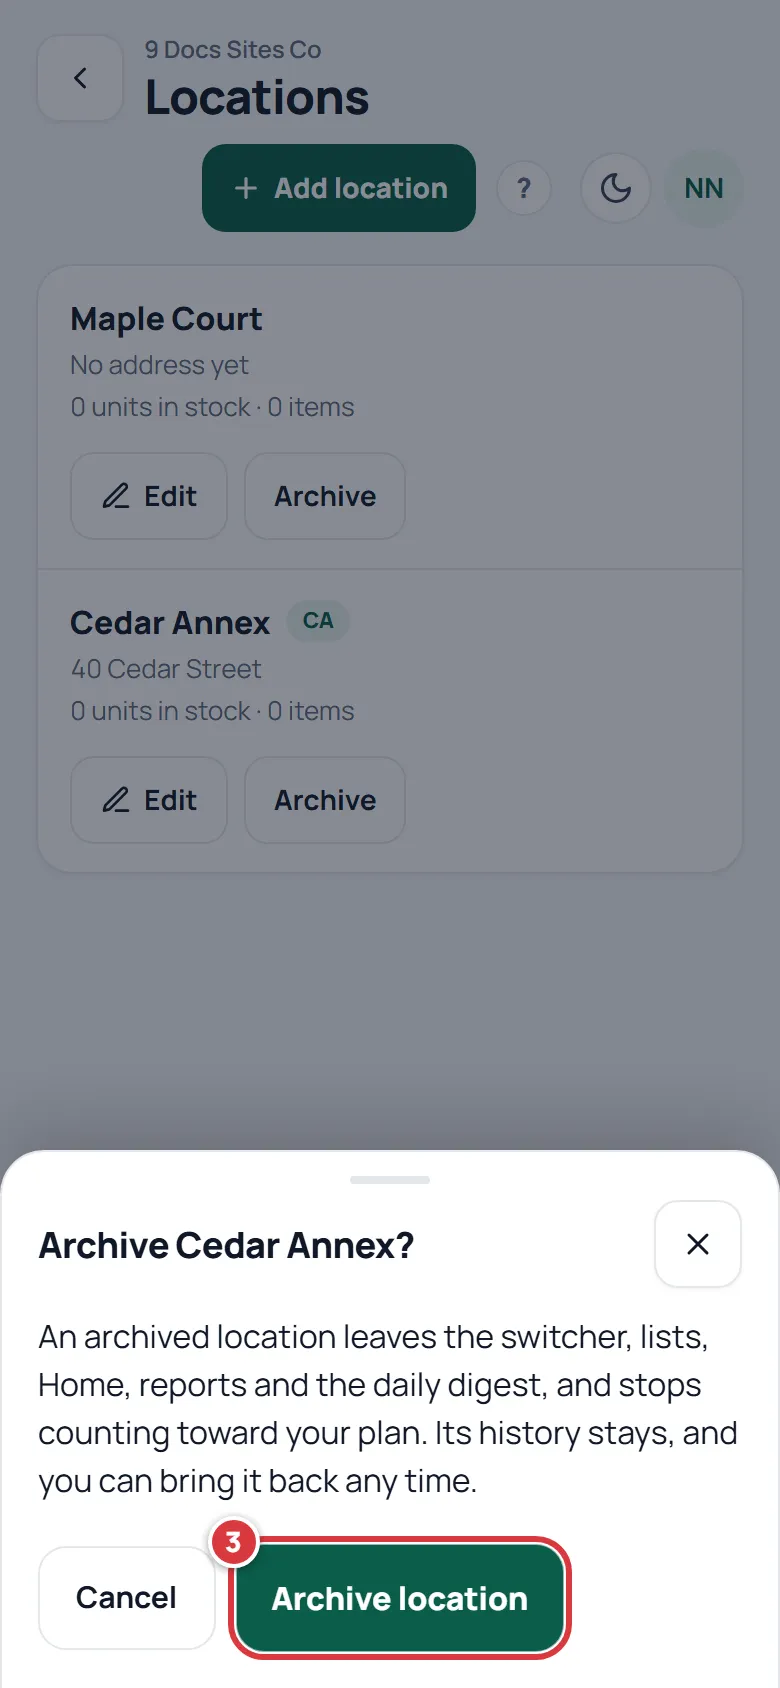
The location moves out of the list. Anyone who had it chosen in the switcher goes back to their default view.
Bring an archived location back#
Tap Settings, then Locations. Then:
- Tap Show archived. The button also shows how many there are, and then changes to Hide archived.
- Tap Unarchive on the location.
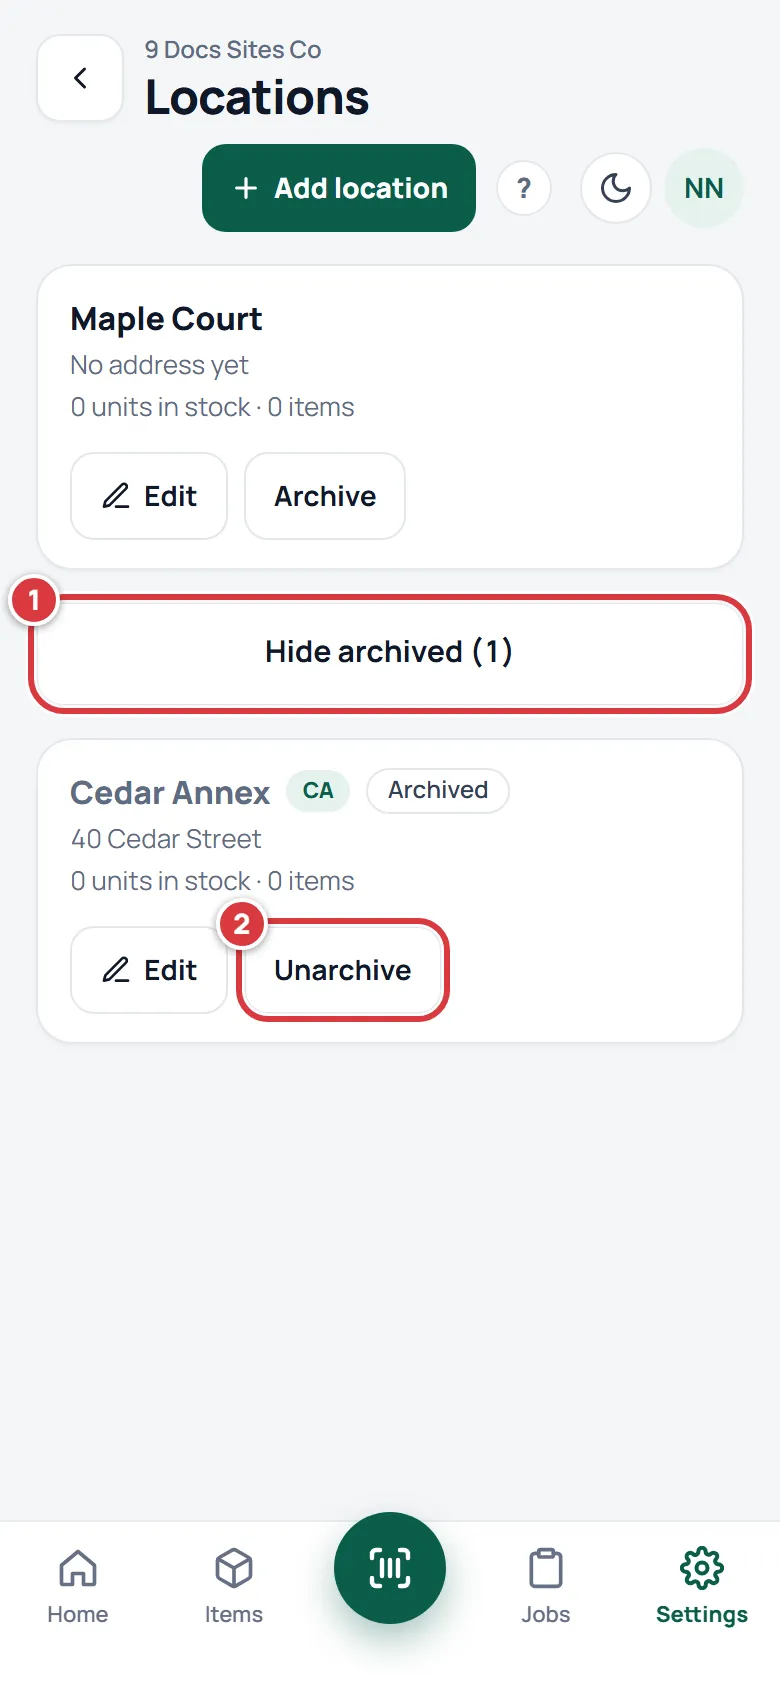
A message says the location is back. It counts toward your plan again, so if your plan is full you get the limit message instead.
What happens at your plan's limit#
Your plan includes a number of locations. When you are at that number, Add location and Unarchive do not work. The sheet shows "Your plan includes" and your number, then "Contact support@a9stockroom.com to add more." An Email support button opens an email to us. Archived locations do not count.
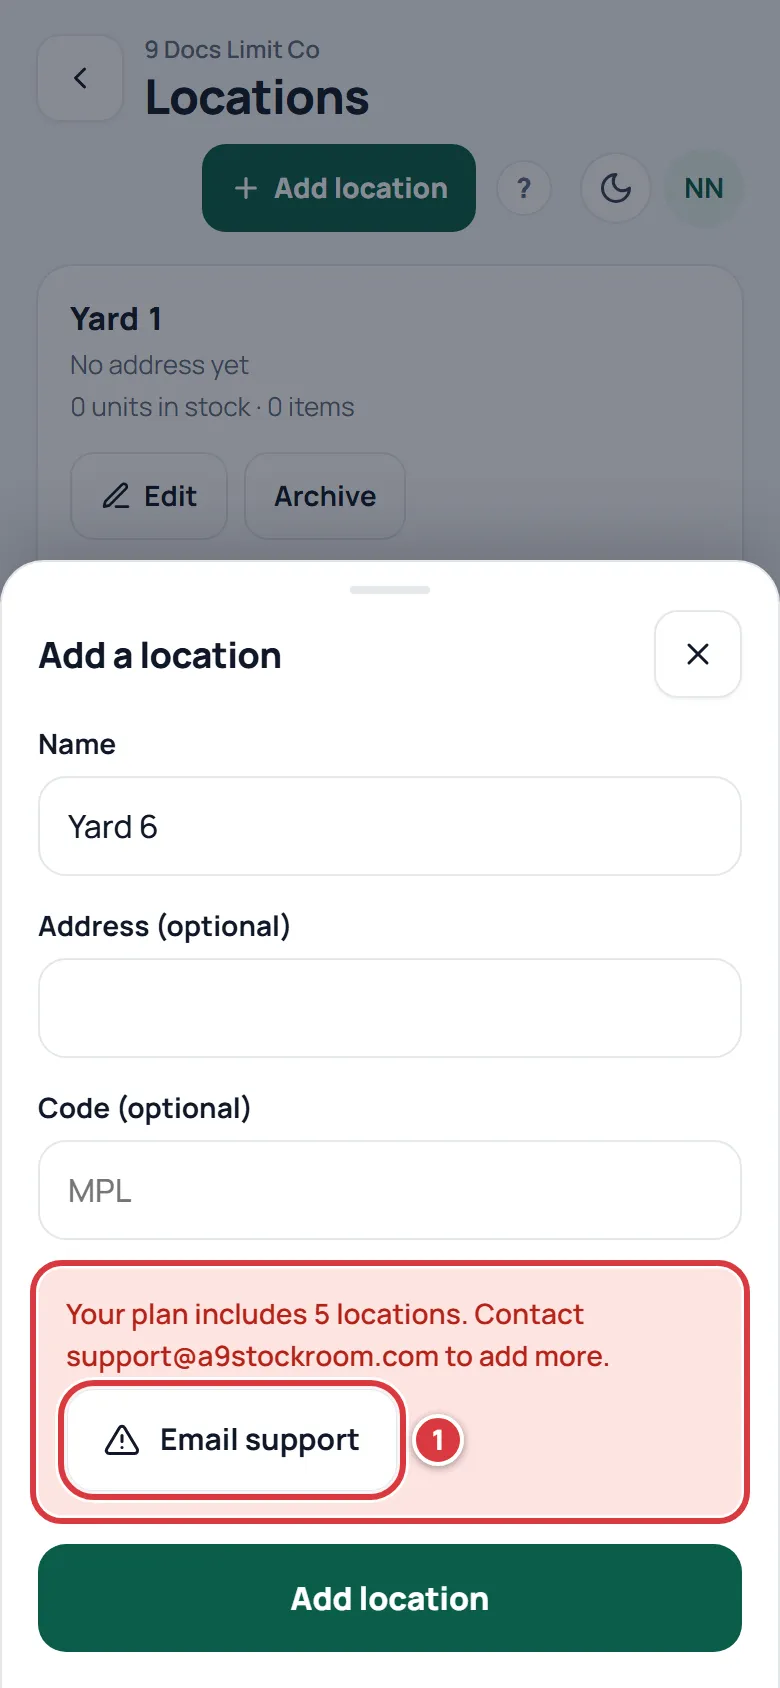
See Your plan.
Switch location#
If you can reach more than one location, you choose which one you are looking at. The choice is saved for you and is still there the next time you open the app. It narrows the numbers on Home, Items, Folders, Low stock and the other lists to that location.
On a phone:
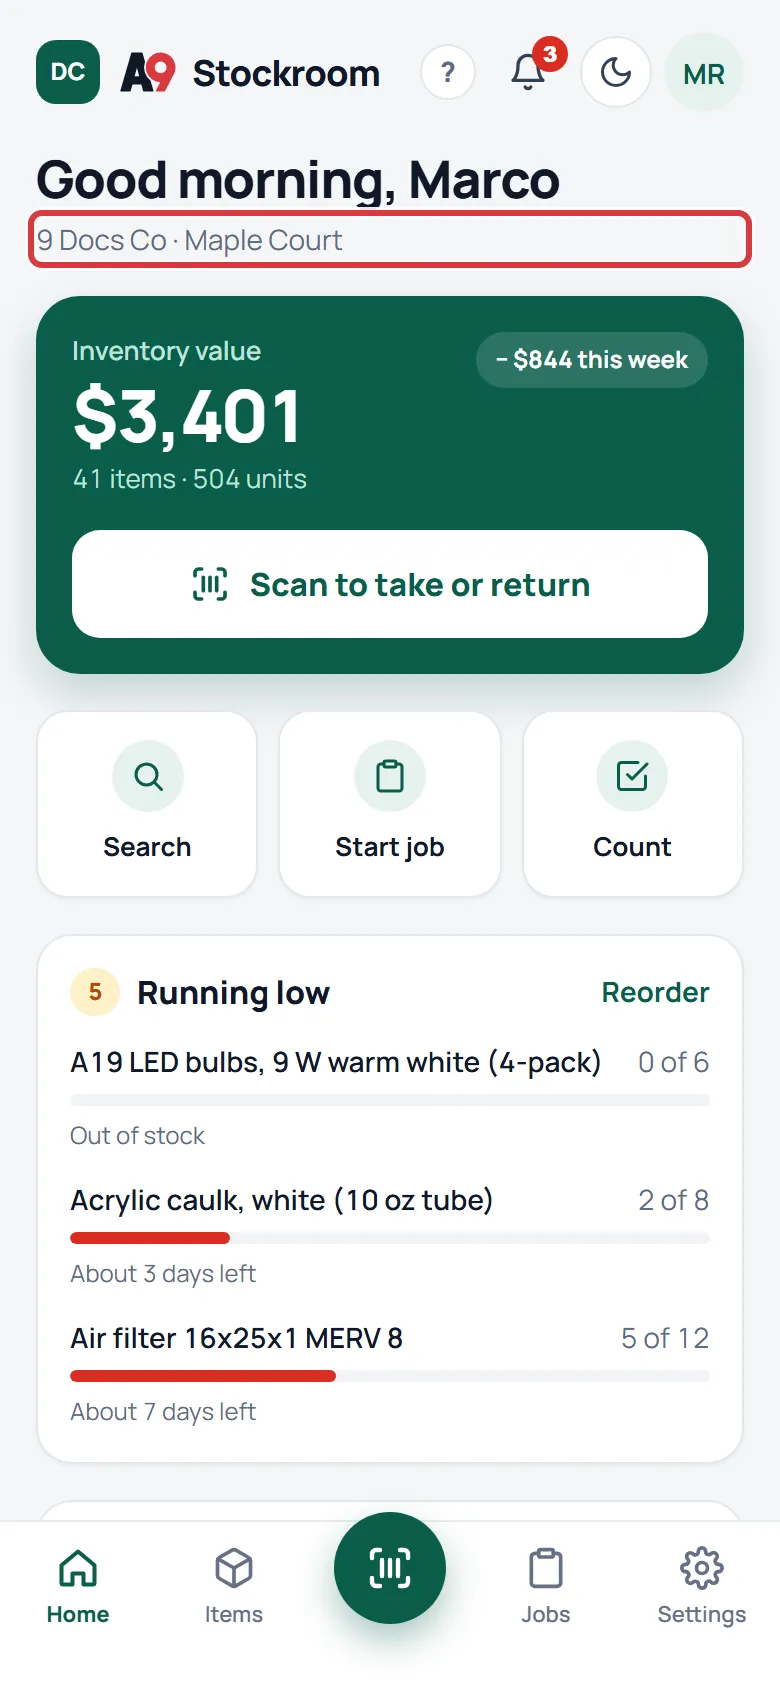
Tap Home. Then:
- Tap the location name under your greeting.
- Pick a location from the menu.
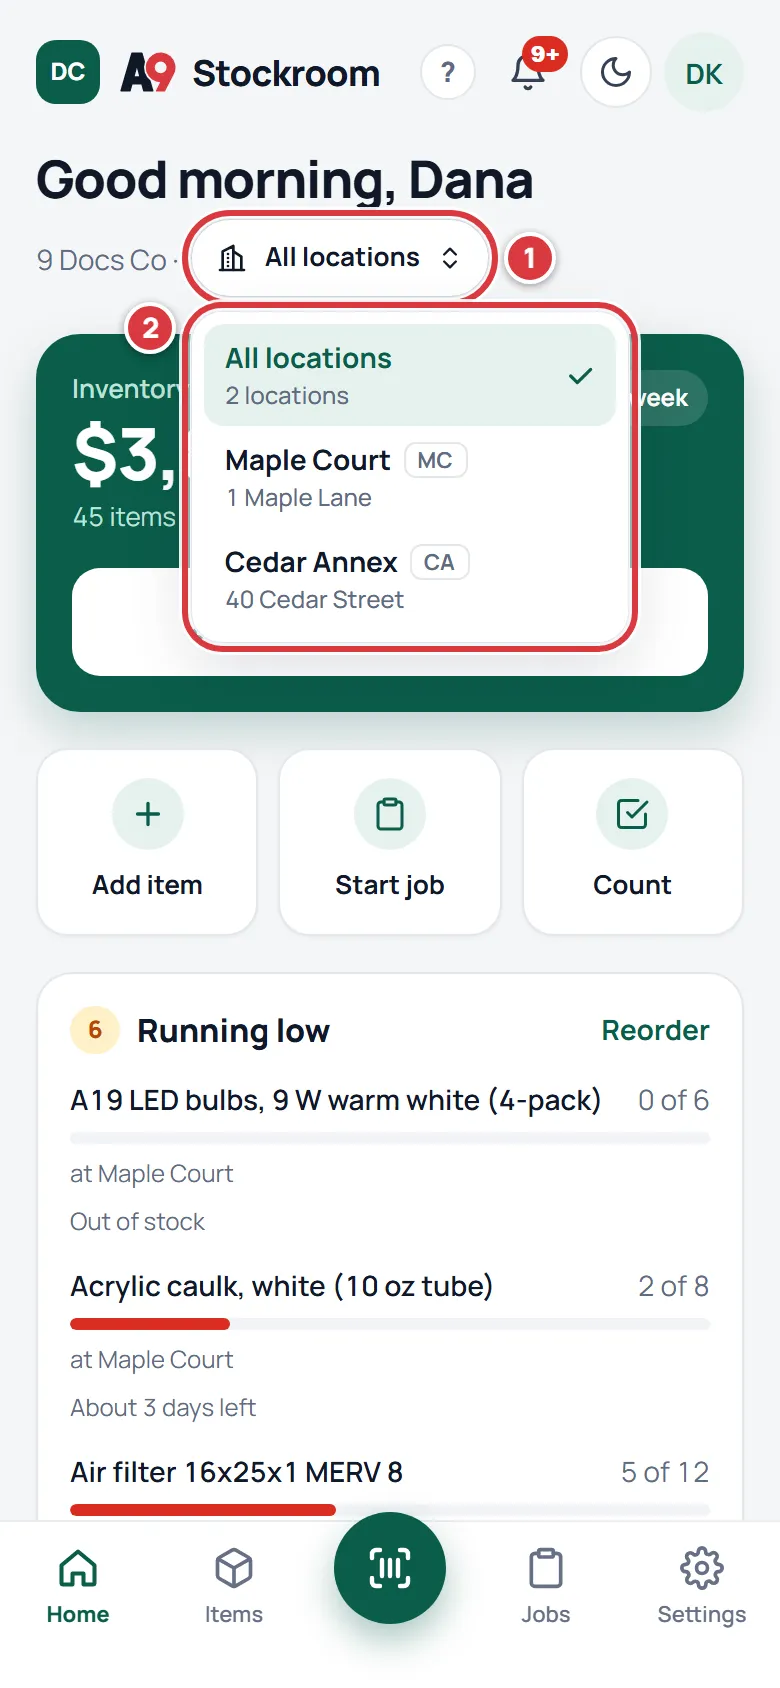
On a computer, click the company and location name at the top of the left menu, then pick one.
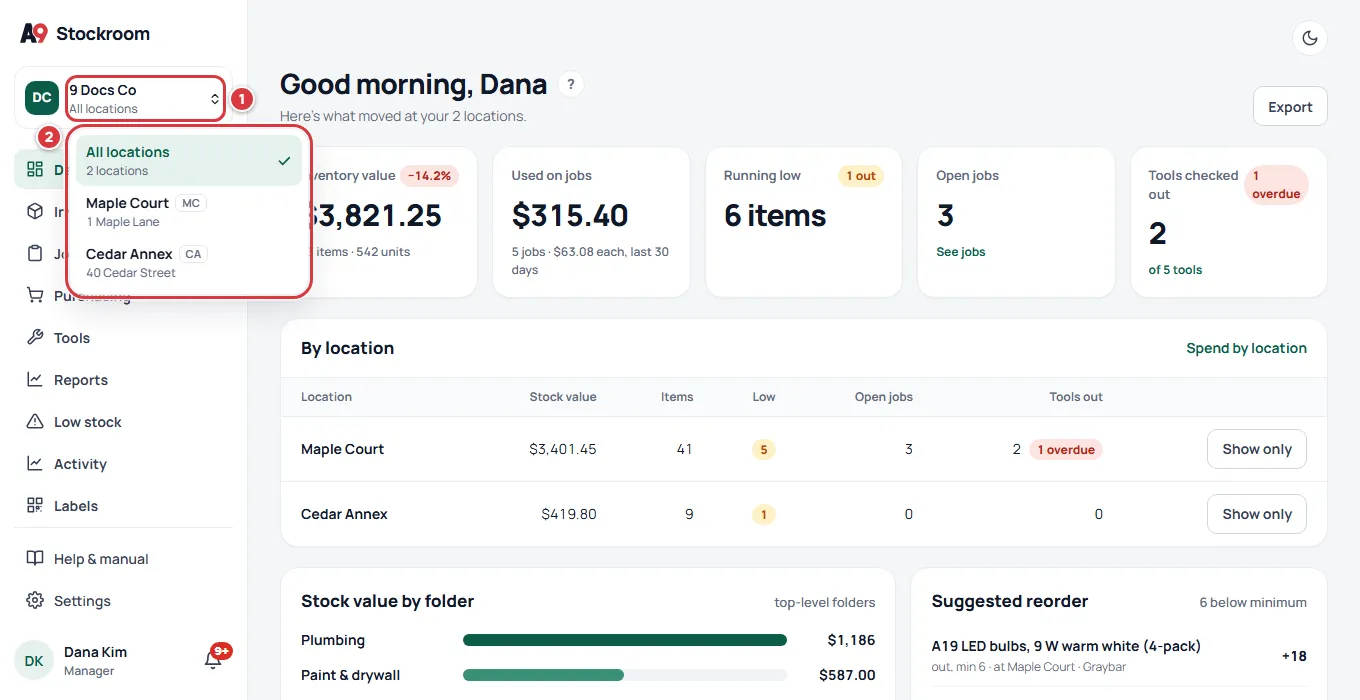
A company with one location has nothing to switch, so there is no menu.
The All locations view#
All locations is the first choice in the menu. It adds every location together. Each item shows once, at the place where it is lowest, and the row says where: "Low at Cedar Annex". See Minimums and reordering.
All locations is part of the Pro plan, and it is for owners, managers and viewers. A tech always picks one of their own locations. On Essentials the menu has no All locations: you pick one location at a time. See Your plan.
Choose which locations a tech can reach#
A tech sees only the folders, jobs and stock of the locations you tick for them. Owners and managers see every location.
Tap Settings, then Locations. Then:
- Scroll to Who works where.
- Under each tech's name, tick the locations they work at.
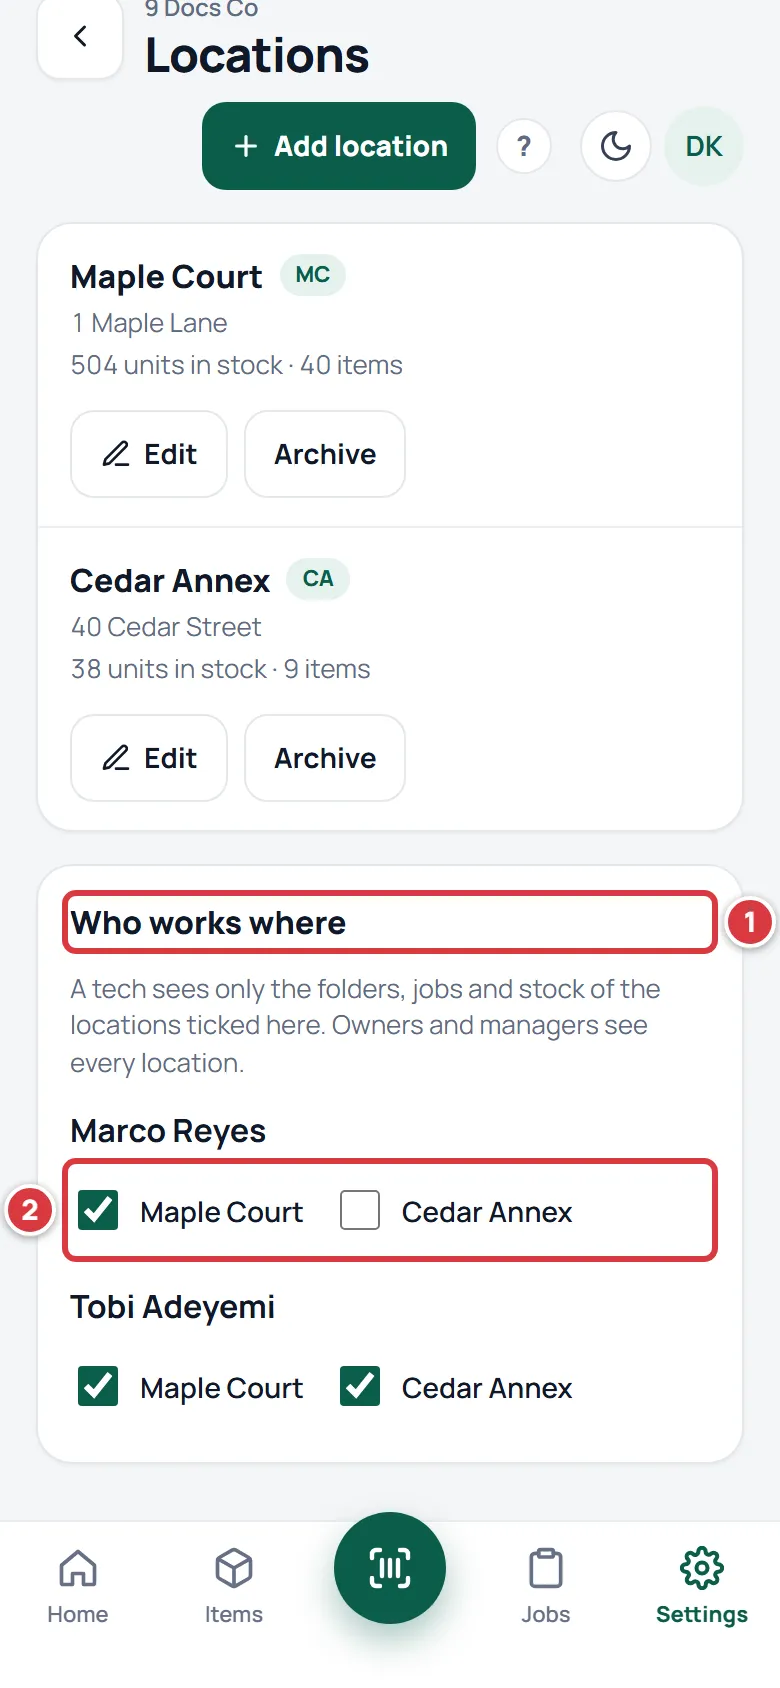
Each tick is saved at once and a short "Saved." appears. A tech with only one location has no switcher: their Home just shows the location's name.
You can also choose locations on the Team screen when you make someone a tech. See Team.
Open the app on one location from a link#
A link to the app can end in ?loc= and a location's id. Opening it puts the app on that location, the same as choosing it in the switcher, and then tidies the address. If you cannot reach that location, nothing changes.
What you'll see#
- A new location shows in the list with its name, its code beside it, its address and "0 units in stock · 0 items".
- After you add a second location, a switcher appears for people who can reach both.
- An archived location is not in the live list. Under Show archived it has an Archived label and an Unarchive button.
- On Home and reports, numbers add up across the locations on show. Pick one location to see only its numbers.
If it didn't work#
Archive says units are still stocked here#
The message is "N units are still stocked here. Transfer them out first." The location still holds stock. Tap Go to items, find what is there and transfer it to another location, or count it down to zero if it is gone. Then archive again. See Moving stock and Counting stock.
Archive says you need at least one location#
The message is "You need at least one location." A company always keeps one live location. Add the new one first, then archive the old one.
Add location says another location already uses that code#
Codes are unique. Pick a different code, or leave it empty.
Add location says your plan includes a number of locations#
You are at your plan's limit. Archive a location you no longer use, or write to support@a9stockroom.com to add more. See What happens at your plan's limit.
Delete says the location still has folders, jobs, orders or tools#
Only a location with nothing in it can be deleted. Archive it instead.
A tech cannot see a location#
Open Settings, Locations, and tick the location under Who works where for that tech.
There is no All locations choice#
You are on the Essentials plan, or you are a tech. See The All locations view.
I do not see Locations in Settings#
Only owners and managers see it. Ask one of them.